Being an Apple User Means You’re Not the Product
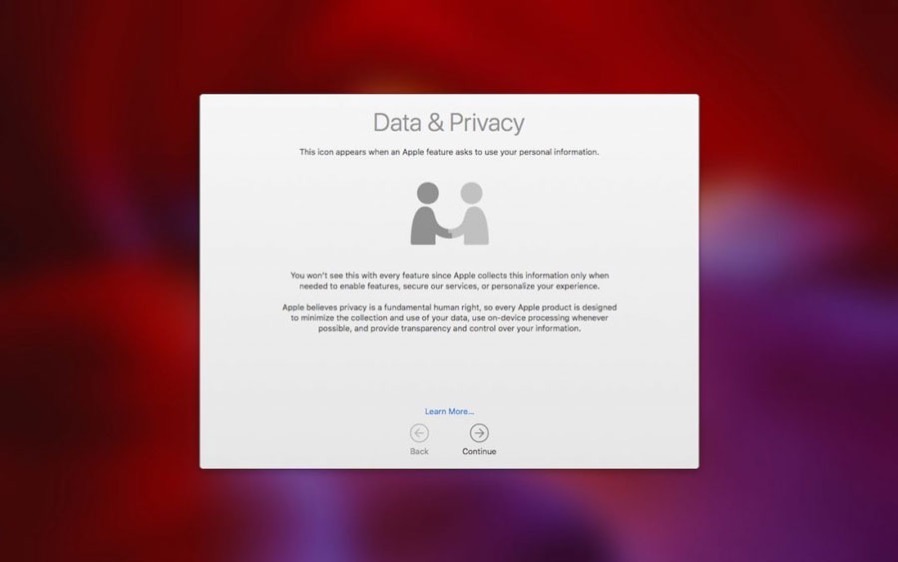
Apple privacy photo
There’s an Internet saying: “If you’re not the customer, you’re the product.” The point is that, if you’re getting a service for free, the company providing it sees you not as a customer, but as a product to sell, generally to advertisers.

This is how Google, Facebook, and Twitter operate. They provide services for free, collect data about you, and make money by showing you ads. In theory, the more that advertisers know about you, the better they can target ads to you, and the more likely you’ll be to buy. Personalized advertising can seem creepy (or clueless, when it fails), but it isn’t inherently evil, and we’re not suggesting that you stop using ad-supported services.

This ad-driven approach stands in stark contrast to how Apple does business. Apple makes most of its money by selling hardware—iPhones, Macs, and iPads, primarily. Another big chunk of Apple’s revenue comes from App Store and iTunes Store sales, iCloud subscriptions, and Apple Pay fees. Knowing more about you, what Web pages you visit, what you buy, and who you’re friends with doesn’t help Apple’s business, and on its Privacy page, Apple says bluntly, “We believe privacy is a fundamental human right.”

Of course, once your data is out there, it can be lost or stolen — in June 2018, a security researcher discovered that the online data broker Exactis was exposing a database containing 340 million records of data on hundreds of millions of American adults. Ouch!

Let’s look at a few of the ways that Apple protects your privacy.

Siri iconSiri and Dictation The longer you use Siri and Dictation, the better they work, thanks to your devices transmitting data back to Apple for analysis. However, Apple creates a random identifier for your data rather than associating the information with your Apple ID, and if you reset Siri by turning it off and back on, you’ll get a new random identifier. Whenever possible, Apple keeps Siri functionality on your device, so if you search for a photo by location or get suggestions after a search, those results come from local data only.

Touch ID iconTouch ID and Face ID When you register your fingerprints with Touch ID or train Face ID to recognize your face, it’s reasonable to worry about that information being stored where attackers—or some government agency—could access it and use it for nefarious purposes. Apple was concerned about that too, so these systems don’t store images of your fingerprints or face, but instead mathematical signatures based on them. Those signatures are kept only locally, in the Secure Enclave security coprocessor that’s part of the CPU of the iPhone and iPad—and on Touch ID-equipped laptops—in such a way that the images can’t be reverse engineered from the signatures.
And, of course, a major goal of Touch ID and Face ID is to prevent someone from violating your privacy by accessing your device directly.

Health iconHealth and Fitness People with medical conditions can be concerned about health information impacting health insurance bills or a potential employer’s hiring decision. To assuage that worry, Apple lets you choose what information ends up in Health app, and once it’s there, encrypts it whenever your iPhone is locked. Plus, any Health data that’s backed up to iCloud is encrypted both in transit and when it’s stored on Apple’s servers.

App Store iconApp Store Guidelines A linchpin in Apple’s approach to privacy is its control over the App Store. Since developers must submit apps to Apple for approval, Apple can enforce stringent guidelines that specify how apps can ask for access to your data (location, photos, contacts, etc.). This isn’t a blanket protection—for instance, if you allow a social media app Facebook to access your contacts and location, the company behind that app will get lots of data on your whereabouts and can even cross-reference that with the locations of everyone in your contact list who also uses the service.

In the end, only you can decide how much information you want to share with the likes of Google, Facebook, and Twitter, and only you can determine if or when their use of your details feels like an invasion of privacy. But by using Apple products and services, you can be certain that the company that could know more about you than any other is actively trying to protect your privacy.


Comparing Before/After Edits in Photos on the Mac

Photos on the Mac provides many editing tools, so many that it’s easy to lose track of how an edited image compares to the original. The good thing is you can always use the Revert to Original command and then undo it, but then you lose all your edits. Maybe you just want to compare your edited version with the original. Well Photos also provides a Show Original button in the upper-left corner, between the window controls and the Revert to Original button. Click and hold this button to see your original image; let up to see the edited version again. Even easier, press the ‘M’ key on your keyboard. The only thing either of those techniques won’t do is show the effect of cropping; to see the uncropped original, press Control-M. And if you just want to see how a particular set of adjustment controls affected the image, click its blue checkmark to turn it off and back on.


Other tips for Photos:
How to use the Camera App’s Hidden Level
Search for Nearly Anything in your Photos Library

Invoke Special Views and Features on the Mac with a Flick of Your Wrist

Hot Corners photo

When you are working on your Mac, you probably have many windows open. Some covering other apps and mostly covering the desktop. As I write this I count at least 10 windows open on my Mac. If you want to look at the Desktop or do something different, you may find yourself clicking around or using keyboard shortcuts, but did you know that you can access many of the Mac’s special views with just a flick of your wrist?

A little-known feature called Hot Corners makes this possible. The key to unlocking Hot Corners is in your System Preferences. You’ll see an options for Hot Corners in both the Desktop & Screen Saver pane and the Mission Control pane. It doesn’t matter which pane you choose, all you need to do is click the Hot Corners button to set up your hot corners.

Hot Corners screensaver

The Hot Corners dialog displays a pop-up menu for each of the four corners of your screen. Choose an action in one of those menus. Once you choose your action, whatever you’ve chosen will happen when you move your pointer to that corner. A hyphen, the default, means nothing happens. In my case I sue the Show Desktop action in the lower left corner. Whenever I need to ge two the Desktop, I move may cursor to the lower left cogent and all my windows move away and show my desktop. I can’t tell you how many times a day I sue this. Here’s the scoop on each action.

Hot Corners Control with callout

Start Screen Saver

Screen Savers are needed with today’s flat-panel LCD screens, but it does hide the contents of your screen and personalize your Mac. The Start Screen Saver hot corner shows the screen saver immediately, overriding the setting for how long the Mac must sit idle before the screen saver turns on (in System Preferences > Desktop & Screen Saver > Screen Saver, in the Start After pop-up menu).

Disable Screen Saver

We also have the opposite of Start Screen Saver – Disable Screen Saver. If you normally have your screen saver set to turn on automatically, it may come on when you would prefer it didn’t, such as when you are thinking about what to write in a tough email. To prevent the screen saver from coming on temporarily, use a Disable Screen Saver hot corner.

Mission Control

Once you’re in this bird’s-eye view of all your Mac’s open windows, you can switch to any window by clicking it. You can also set up spaces in Mission Control—a space is a view that contains only windows from the apps that are assigned to that space. Click the plus sign in the top-right corner and then drag windows up into the new space. Switch to a space by clicking it in the top bar. On my Mac, this is the top left corner action.

Hot Corners Mission Control

Application Windows

For an overview of all open windows for a particular app, use a hot corner to invoke Application Windows. This view displays thumbnails of all open windows in the current app. For some apps, you’ll also see thumbnails of recently opened documents at the bottom of the view. Click any thumbnail to switch to it.

Hot Corners App Windows

Desktop

If you like storing documents for in-progress projects on your Desktop, you’ll love the hot corner that invokes Desktop view. It moves all open windows aside, letting you focus on the icons on the Desktop. The windows return when you switch to an app. As I mentioned earlier, this is my lower left action.

Dashboard

If you are a fan of the Dashboard, you can create an action to open the Dashboard. The Dashboard contains a few rudimentary widgets, like a clock and a calculator. Apple hasn’t updated Dashboard in years, and developers don’t create Dashboard widgets anymore, so it’s not worth learning—or using via a hot corner—if you don’t already rely on it.

Notification Center

Since you can so easily click the Notification Center icon in the far right of your menu bar, it’s seldom worth wasting a hot corner on it. Notification Center has two views: Today and Notifications. Today shows status information and is easily customized; click the Edit button at its bottom. To display an app’s notifications in Notifications, go to System Preferences > Notifications, select the app, and then select the Show in Notification Center checkbox.

Launchpad

If you like using iOS, giving Launchpad a hot corner might make opening apps on your Mac easier. It’s designed to look and work like the Home screen on an iPad or iPhone—just click an app to launch it. To see more apps, scroll horizontally—with a trackpad, swipe with two fingers; with a Magic Mouse, scroll by swiping with one finger on the mouse surface.

Put Display to Sleep

Those who are concerned about energy usage might appreciate this option. Toss your pointer in the associated hot corner, and your screen goes to sleep immediately, consuming less power than a screen saver. It lets you override the “Turn display off after” slider in System Preferences > Energy Saver.

To exit these special views, switch to another app, press the Escape key, put the pointer back in the hot corner again, or just move the mouse.

If you find yourself triggering a hot corner accidentally, try adding a modifier key so its action activates only when the pointer is in the corner and the key is pressed. To set this up, open the Hot Corners dialog, open the corner’s pop-up menu, and press a key (Shift, Control, Option, or Command). The key’s symbol appears in the menu. Keep the key down and choose the desired action.

Hot Corners Control with callout

The best way to set up your hot corners depends on how you use your Mac, of course. My favorites are the Mission Control, so I have access to my full screen apps, and Desktop because it removes screen clutter that gets in the way of using the Desktop.

Did You Know You Can Customize the Columns in a Finder Window’s List View?

Finder columns photo

When a Mac folder contains a lot of files, the Finder’s List view often works best in my opinion. Why? It let’s you focus on a single folder. Wiht the column view you can also easily sort the contents by clicking the different columns: Name, Date Modified, Size, and Kind. But you can do more. Did you know that you can resize columns, rearrange them, and even add and remove columns? To resize a column, drag the vertical separator line to the right of its name. To move a column, click and hold on its name, and then drag it to the desired position. And to add or remove a column, Control- or right-click any column header and select or deselect the desired column. Choose from Date Modified, Date Created, Date Last Opened, Date Added, Size, Version, Kind, Comments, and Tags.

Finder columns

Here’s How to Find Out if Your Online Passwords Have Been Stolen

Pwned photo

Unfortunately data breaches have become commonplace. Online thieves are constantly breaking into corporate and government servers and making off with millions—or even hundreds of millions!—of email addresses. In some case these thieves will also get other personal information like names, physical address, and passwords.

This may not seem like a big deal – who cares if someone reads the local newspaper under your name? But since many people reuse the same passwords across multiple sites, these thieves will take that password and test it against other sites, possibly getting into other sites of yours that are more personal.

Pwned LinkedIn breach

Password security hasn’t always been a big deal on the Internet, and many people reused passwords regularly in the past. Wouldn’t it be nice to know if any of your information was included in a data breach, so you’d know which passwords to change?

A free service called Have I Been Pwned does just this (“pwned” is hacker-speak for “owned” or “dominated by”—it rhymes with “owned”). Run by Troy Hunt, Have I Been Pwned gathers the email addresses associated with data breaches and lets you search to see if your address was stolen in any of the archived data breaches. Even better, you can subscribe to have the service notify you if your address shows up in any future breaches.

Pwned list
Needless to say, you’ll want to change your password on any site that has suffered a data breach, and if you reused that password on any other sites, give them new, unique passwords as well. If you use a different password for each site, even if one of your passwords was compromised, attackers can’t break into any of your other accounts.

I recommend you take some time to check for and update compromised, vulnerable, and weak passwords. Start with more important sites, and, as time permits, move on to accounts that don’t contain confidential information.

How to Make the Most of Apple’s New AirPlay 2

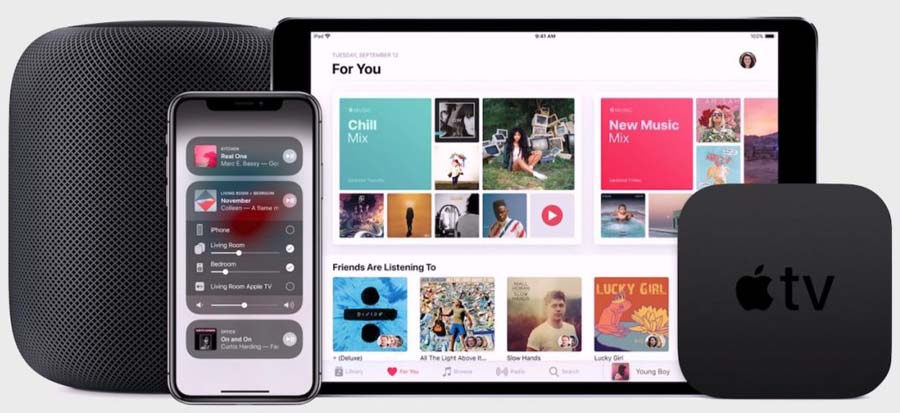
AirPlay 2 photo

If you aren’t familiar with Apple’s AirPlay feature, Airplay makes it possible to stream audio from an iOS device or Mac to an AirPlay-enabled speaker, AirPort Express base station, or most recently, a HomePod. Because AirPlay transfers sound over a Wi-Fi network, it eliminates the need for stereo wires and lets you put your speakers where you want them.

Back in June 2017, Apple announced AirPlay 2. With Airplay 2 you could play the same song on multiple speakers (with AirPlay 1, this is possible only in iTunes on the Mac) or play different songs on different speakers. Subsequently, Apple released the HomePod, promising to add multi-room audio and stereo sound with linked HomePods in the future. All these new features requiring Airplay 2.

Apple recently released three updates—iOS 11.4, tvOS 11.4, and HomePod 11.4—with an eye toward delivering AirPlay 2 and these promised features. Once you’ve installed these updates, here’s how to start enjoying AirPlay 2’s improvements (What OS are you running?).

AirPlay 2 in iOS

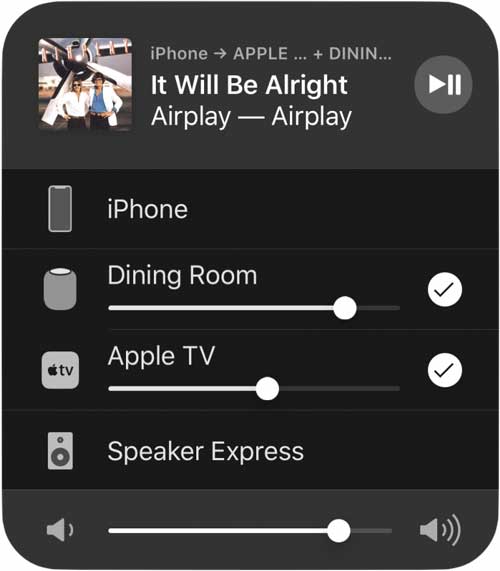
To take advantage of the multi-room audio capabilities on your iPhone or iPad, start playing some audio. Then open Control Center and press the audio card to expand it. Now tap the AirPlay button in the upper right. You will see a list of available output devices; those that support AirPlay 2 have a circle to the right of the name. Tap one or more of those circles to send the audio to that speaker. If an app has its own AirPlay button, you can also tap that to access the same controls.

AirPlay 2 in iOS

The iPhone can’t play audio simultaneously with an AirPlay 2 speaker, which is why there’s no circle next to iPhone in the image above. Although AirPlay 1 devices—such as the AirPort Express base station (Speaker Express above)—still work singly, they can’t be included in a multi-room set.

AirPlay 2 in tvOS

Once your Apple TV is running tvOS 11.4, it can become an AirPlay 2 speaker, sending audio through your TV, soundbar, or home theater system. In my case I can use my Sonos Playbar through my Apple TV. It can also broadcast its own audio to other AirPlay 2 speakers.

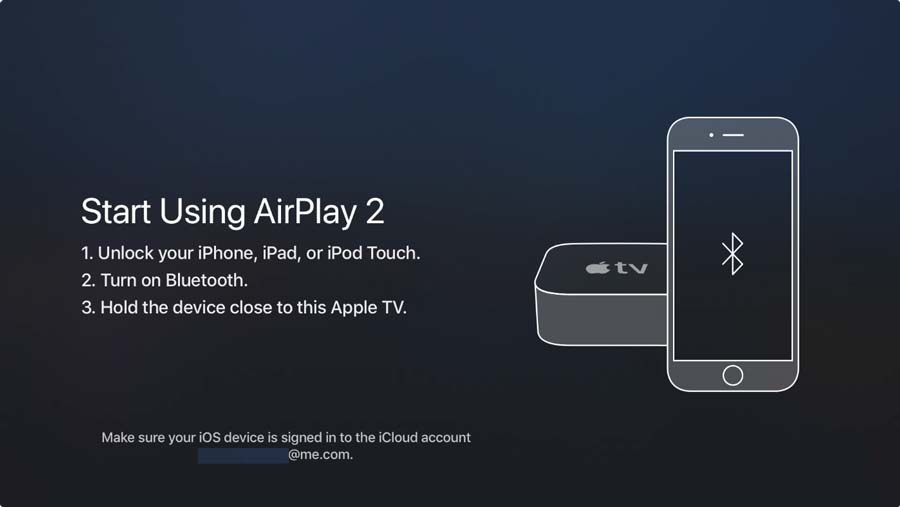
To enable an Apple TV for AirPlay 2, go to Settings > AirPlay > Room, and bring your iPhone or iPad close to the Apple TV. Accept the prompt that appears on the iPhone or iPad, and the Apple TV joins other AirPlay 2 devices associated with your Apple ID.

AirPlay 2 tvOS setup

Once it’s set up, you can send audio from the Apple TV to different speakers. In a video app, swipe down from the top of the Siri Remote, select Audio, and then select one or more speakers (not all video apps offer this feature).

AirPlay 2 tvOS video

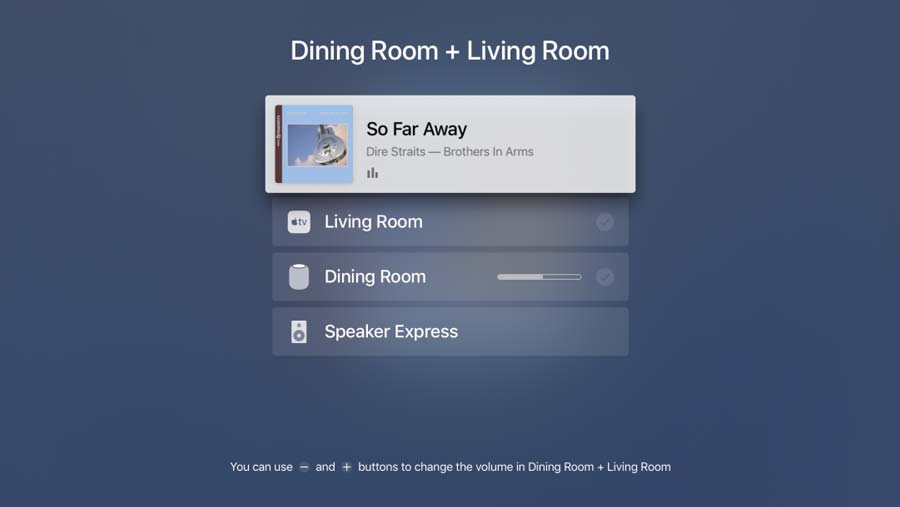
For music, the steps are a little different. Start playing some music and then, from the Music app’s Now Playing screen, swipe up and to the left to highlight the AirPlay button (if no icons are showing at the top of the screen, press the Menu button to display them). Or—this is much easier!—just press and hold the Play/Pause button on the Siri Remote. Then, as in iOS, select the desired AirPlay 2 speakers with circles to the right of their names by swiping down and clicking the touchpad.

AirPlay 2 tvOS speakers

You can also send all Apple TV audio to AirPlay 2 speakers by going to Settings > Video and Audio > Audio Output and selecting the desired speakers.

Other AirPlay 2 Improvements

AirPlay 2 includes a few welcome performance improvements. You’ll have fewer audio drops due to a larger streaming buffer, and tighter device syncing provides a faster response when you play or pause the music. Another plus for iOS users is that taking a phone call or playing a game won’t interrupt playback.

Siri works better with streaming audio as well. You can specify which speaker Siri should play through, as in “play Tears for Fears Shout on Dining Room,” and play the same music through all your speakers with a command like “play the Brandenburg Concertos everywhere.” You can even move audio from one speaker to another—try asking your HomePod to “move the music to the Apple TV.”

Also, AirPlay 2 speakers are now HomeKit accessories, so you can start and stop them in the Home app.

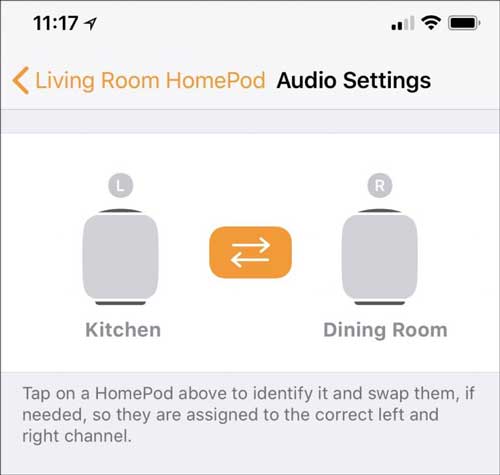
Finally, although it’s unclear whether this feature is part of AirPlay 2, a pair of HomePods can now act as stereo speakers. Once each HomePod is running 11.4, a new option to pair them appears in the HomePod settings in the Home app. Select the HomePods, assign them to the left and right sides, and you can enjoy true stereo music.

HomePod pairing

It may sound as though all AirPlay 2-compatible speakers come from Apple, but in fact, a wide range of speaker manufacturers—including names like Bang & Olufsen, Bose, Denon, Marantz, Polk, and Sonos—have committed to supporting AirPlay 2, either with updates to existing products or in new speakers. Look for such products later in 2018, and, in the meantime, we hope you enjoy using AirPlay 2 with HomePods and Apple TVs.

Search for Nearly Anything in Your Photos Library

Searching Photos collage photo

Apple’s Photos app on the Mac can identify thousands of different objects in your photos. This makes it easy to find photos based on their content. Some of what you can find include objects (cars and trains), scenery (beaches and forests), location, and even some events (weddings and parades). This is both big fun and useful for those times when you can’t remember when you took a photo, but do remember what’s in it, like a cat, camera, or carousel. To perform a search like this, type the search term into the Search field on the right side of the Photos toolbar. From the list that appears, choose the Category result. In macOS 10.13 High Sierra’s version of Photos, you can filter your results from the Showing menu at the upper right of the window. I will say that this feature isn’t perfect, so you may see some odd results or miss some photos, but it’s way faster than browsing manually!

Searching Photos cat

What’s Apple’s New Messages in iCloud Feature all about?

Messages icloud photo
One of the promised features when Apple first announced macOS 10.13 High Sierra and iOS 11, was Messages in iCloud, a way of syncing your conversations in Messages via your iCloud account. Despite the fact that Messages already tries to sync its conversations between your devices, this feature proved difficult for Apple to deliver, and it didn’t appear until the recently released macOS 10.3.5 and iOS 11.4 (What version OS are you running?).

With Messages in iCloud, your conversations and their attachments in your iCloud account are stored on Apple’s iCloud servers, rather than on each of your devices individually. One advantage of this feature is it can offload non-trivial amounts of data to iCloud, freeing up more space on that 16 GB iPhone.

Another advantage is conversations should also sync perfectly and more quickly than in the past, something that was often frustrating when conversations didn’t quite match up across device. (iOS 11.4 also fixes a bug that could cause some messages to appear out of order.) Even better, deleting a conversation or attachment on one of your devices deletes it from all of them.

So what are the disadvantages? Enabling Messages in iCloud does count against your iCloud storage space. That said, if you back up your iOS devices to iCloud, removing Messages data from each device—such as your iPad and iPhone—and storing a single copy in iCloud should result in less overall iCloud usage. (And, realistically, if Messages in iCloud would make you need a higher tier of iCloud storage, you were probably going to need to upgrade soon for other reasons anyway.)

Enabling Messages in iCloud is simple.

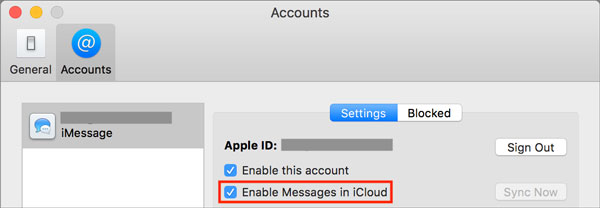
  • On the Mac, open Messages > Preferences > Accounts and select the Enable Messages in iCloud checkbox.

Messages iCloud Mac

  • In iOS, go to Settings > Your Name > iCloud, and turn on Messages.

There are three quirks to be aware of:

  • You won’t be able to enable Messages in iCloud unless you’ve enabled two-factor authentication for the Apple ID associated with your iCloud account. This is a good idea for security reasons anyway!
  • On the Mac, in the Messages account preferences, there’s a Sync Now button you can click if, for some reason, Messages hasn’t synced automatically. We don’t yet know if or when that will be necessary.
  • When you first enable Messages in iCloud in iOS, you may see a note at the bottom of the screen saying that uploading to iCloud requires the device to be plugged in and connected to Wi-Fi. That’s necessary only for the first big upload.

Messages iCloud paused

Should you wish to turn off Messages in iCloud, be aware that it may take some time for each device to download all the messages.

For most people, Messages in iCloud is a no-brainer. Syncing your messages works the way you’d expect, complete with quick updates and universal removal of deleted conversations. The main reason you might not want to enable the feature is if you have only the free 5 GB of iCloud storage and aren’t interested in paying for more space.

What OS Version Are You Running? Here’s How to Find Out.

Which OS photo

When troubleshooting your Mac, one of the first questions is always, “What version of the operating system are you running?” There’s a big difference between Mac OS X 10.6 Snow Leopard and macOS 10.13 High Sierra, and the solution to any particular problem will likely revolve around knowing what operating system you have installed.

The same is true of Apple’s other operating systems: iOS, watchOS, and tvOS. And, let’s not forget, Apple’s AirPods and HomePod both have system software that can be updated as well.

Do you know how to find the version of OS you are using when you have a problem? If not, here’s how to find the version of each of Apple’s operating systems.

macOS
On the Mac, click the Apple menu in the upper-left corner of the screen and choose About This Mac. A window opens, displaying the name (macOS High Sierra shown here) and version (10.13.4) of the running version of macOS.

Which OS Mac
Every now and then, it can be important to learn the build number too—it’s one step more specific than the version number. A new Mac may have a different build number of the same version of macOS, for instance, or Apple may push out a silent security update that changes the build number. To find the build number, simply click the version number—the six-character build number (17E202) appears in parentheses, as above.

iOS
On an iPhone, iPad, or iPod touch, you find the version number in Settings > General > About. Scan down the screen until you see the Version line, which tells you both the version of iOS and the build number.

Which OS iPhone

watchOS
With watchOS there are two ways to find the version of watchOS you are running on your Apple Watch:

  • On the watch, open the Settings app, scroll down to and tap General, tap About, and then scroll down until you see Version.Which OS Apple Watch
  • On your iPhone, open the Watch app and make sure My Watch is selected in the bottom button bar. Then go to General > About to see a screen that displays much the same information as the Settings app on the watch, including the version number.
    Which OS Watch app

tvOS
By now, you can probably guess that on an Apple TV you go to Settings > General > About to find the tvOS version. Apple is nicely consistent in this regard. That said, only the fourth-generation Apple TV and Apple TV 4K run tvOS. The second and third generation Apple TVs, which are obsolete, are instead based on a stripped-down version of iOS, and the first-generation Apple TV is an entirely different beast yet, with its large white case and internal hard drive.

Which OS Apple TV

AirPods
You’re unlikely to need to check the version of your AirPods, but if it ever comes up, make sure the AirPods are either connected to their host iOS device or in their case with the top open. Then, on the host iOS device, go to Settings > General > About > AirPods and look for the Firmware Version line.

Which OS AirPods

HomePod
To check the version of the HomePod software, open Apple’s Home app, make sure Home is selected in the bottom toolbar, and then press and hold on the HomePod’s tile until it opens. Then tap the Details button in the lower right and scroll down until you see the Version line.

Which OS HomePod

Look Up All Sorts of Information with a Quick Click or Tap on the Mac

Look up info photo

Were you ever reading anything on your Mac and you came across a word you wanted to look up? Happens to me for often than I like to admit. Well Apple makes it easy to look up information about any word you can see on your Mac, in nearly any app. To access this information, Control- or right-click the word and choose Look Up “word” in the menu that pops up, use the trackpad to tap the word with three fingers, or hover the pointer over it and press Command-Control-D. macOS displays a popover with a dictionary definition. Bonus tip: In macOS 10.12 Sierra and later, you can also swipe right with two fingers on the trackpad (or click the buttons at the bottom) to see much more in the popover, including Wikipedia entries, apps, news, sports info, movies, TV shows, music, maps, Twitter accounts, and more. Give it a try a few times, and it might become a habit! It is with me. :)

Look up info apple

Use Copy as Pathname on the Mac to Help Someone Find a File

Copy as Pathname photo

Have you ever needed to show someone where to find a file on the Mac? Maybe you want to write it out in an email? As an example, I want to share where to find the Quickbooks backup files. Well rather than write out instructions like “Look in the Backup Files in the Quickbooks folder in the Documents folder in Users folder,” just select the file or folder in question (in my case the Backups Files folder), hold down the Option key, and choose Edit > Copy “ItemName” as Pathname. (A pathname, or path, is the sequence of nested folders that holds a file or folder, such as /Users/danwassink/Documents/QuickBooks/Backup Files.) Once you copy it, paste the path into an email message or word processing document (or wherever you like). You’ll now have the entire thing exactly where you need it, and you don’t have to worry that you’ve accidentally left out a navigational step.

Pathname

How to Force Quit an app on the Mac

Force quit

Mac apps are pretty stable these days, but every once in a while you may have it where that app is acting strange and you want to quit it. Maybe it’s frozen and you can’t even quit it even if you wanted to. This is usually an older app when it happens to me. You could restart your Mac, but there is an easier way – force quit the app causing you the issue.

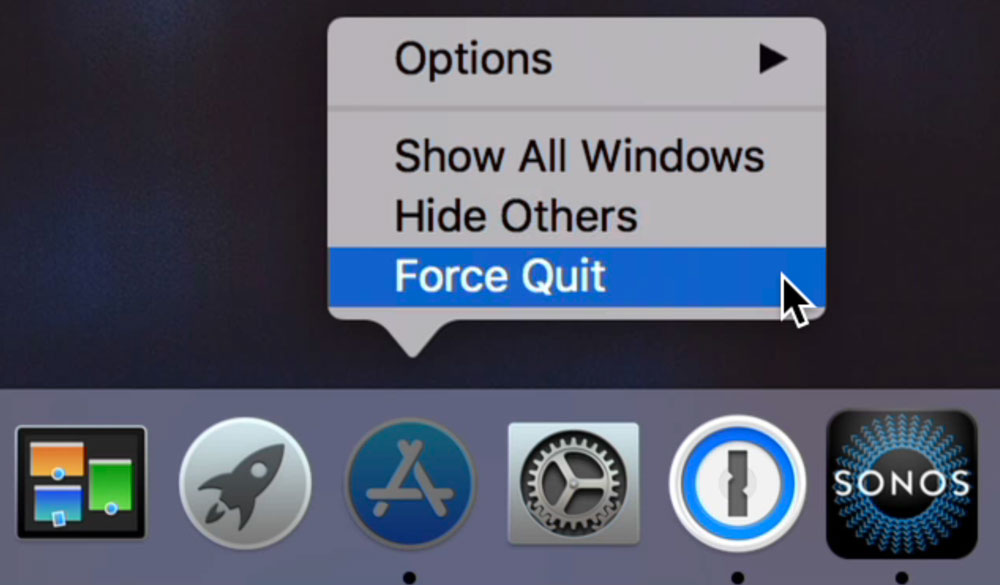
How do you quit it without restarting your Mac? It’s pretty easy. Go to the app’s icon in your Dock. When you hold down the Control key and click on it, you are going to get a few options, one being Force Quit. Just select this and the Mac OS will force that app to quit. In most cases you can restart it and everything will be fine. Hope the tip helps!

Automatically Open your Apps on your Mac

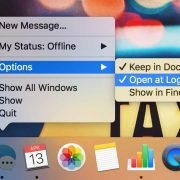
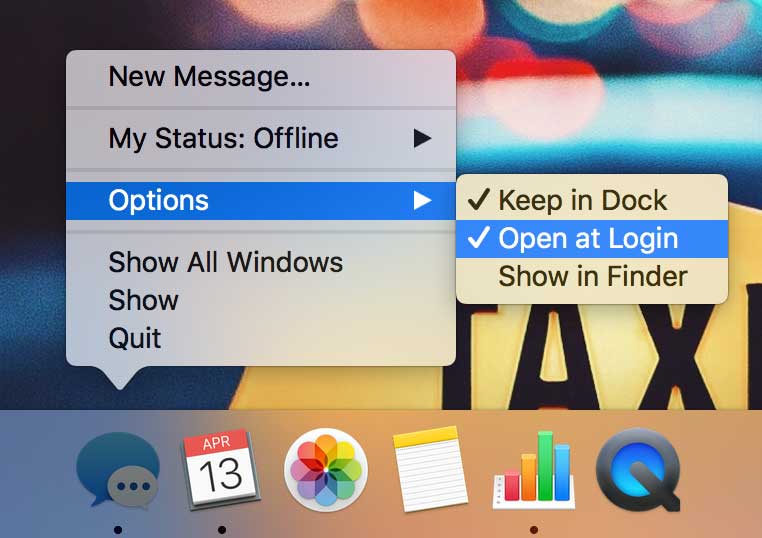
Have you ever wanted to automatically open an app when you start your Mac? In the past this was, and still can be, done through the Mac’s System Preferences. But there is an easier way – through the Dock. All you need to do is make sure the app you want to automatically open is in the Dock, the easiest way to do this is to just open it. From there you hold down the ‘control’ key and click on the app’s icon in the Dock. You’ll see Options. Select this and the select Open at Login. You’ll also see an option to keep the app in the Dock. If you no longer need the app to open automatically, you can deselect it as well. Hope this tip helps!

Viewing YouTube Videos using Picture-in-Picture on your Mac

Youtube pip

You may know that with some videos you can view them in picture-in-picture mode on your Mac. A video from vimeo, as an example, will have a small icon representing picture-in-picture. When you click on it, the video will float above all your windows and move to a corner on your Mac, thereby allowing you to view the video while working. You can resize it and move it to a different corner just by dragging it. I use this quite a bit.

But did you know you could do this with YouTube videos too? You can’t do it by finding an icon nor by control-clicking on it (holding down the control key and clicking on it). So how do you do this? You need to control-click on it twice, yes, two times. When you control click on it a second time, you’ll get a new menu with the picture-in-picture option. Select this and your YouTube video will pop out above all your other windows and move to a corner on your Mac. So the next time you want to watch a video from YouTube on your Mac, control-click on it twice – and keep working. :)

Re-organize your Preference Panes on a Mac

Sort options

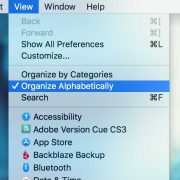
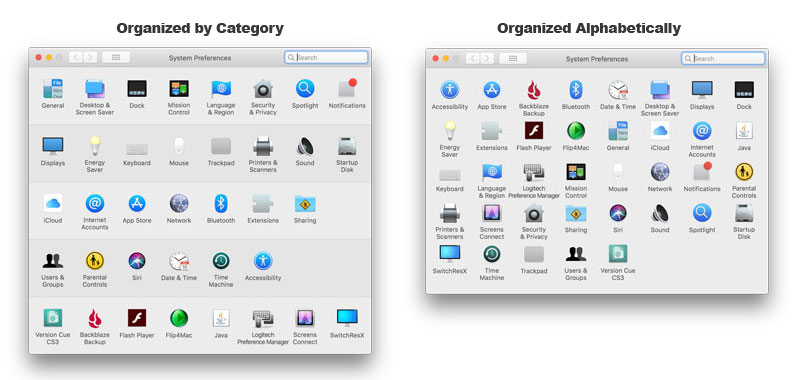
Did you know you could re-organize your preference panes in the System Preferences on a Mac? If you don’t like them grouped or organized by category, you can also organize them or sort them alphabetically. It’s easy – just open your System Preferences and go to the Menu Bar. From there select View. You’ll see two options:

  • Organize by Category
  • Organize Alphabetically

Just select how you want your preference panes to be sorted and the Mac will re-organize your preference panes for you. Bonus tip, if you select Customize under the View menu, you can hide preference panes too. :)

Menu Bar