iMovie for Mac Review.
Create great looking movies out of your Photos and Videos.
I’ve been intrigued with creating movies since I was a kid. It may have been the 8mm film camera we had. My friends and I would go out and create scenes from TV and movies including recreating the Six Million Dollar man running. When you watched it on TV, he was running in slow motion. We had to recreate this by speeding the shutter up in the camera. Back then all the editing we did was in with the camera. It was fun, but very limiting.
A few years later, we’ll more than a few, Apple introduced iMovie. This was in 1999. After seeing what iMovie could do, that fire came back, I wanted to edit movies. The first thing I did was go out and buy a Firewire camera to see how this worked. Even though iMovie didn’t do much back then, I had a lot of fun creating simple movie projects on my Mac. I was hooked.
Move forward 17 years, iMovie is still around and now it is available on the Mac, iPad, and iPhone, although for this review I am only looking at the Mac version of iMovie. Specifically version 10.12 with was released in April of 2016. With this version I can add multiple audio tracks, add special effects such as picture in picture, and even add green screen effects. All on my MacBook Pro. iMovie had grown up, but the best part is even though Apple added new features to iMovie, it was still fun to use. I am still hooked.
If you are not familiar with iMovie, you can easily create movies with transitions, titles, and even special effects. The best part is these movies are created from your own photos and videos. You can import from tape based cameras and the newer solid state cameras which use an SD card. I have found myself using my iPhone for most of my original or raw footage these days as the camera on an iPhone works great. You can even import an iMovie project you started on your iPhone or iPad and finish it on your Mac as the Mac version has more features than the other versions.

To get the footage on your Mac and in iMovie you first have to import the videos. You can also import photos from your hard drive, an SD card, and the Photos app on your Mac. If you use an SD card, when you open iMovie and click on the import button, you’ll see your SD card and you can select all of your photos, all of your videos, both videos and photos, or even select specific photos and videos. When you import them, you import them into Events. This keeps all your footage together as an event so you can easily find them when you create your project. Once all your photos and videos are imported, now all you need to do is create your project.
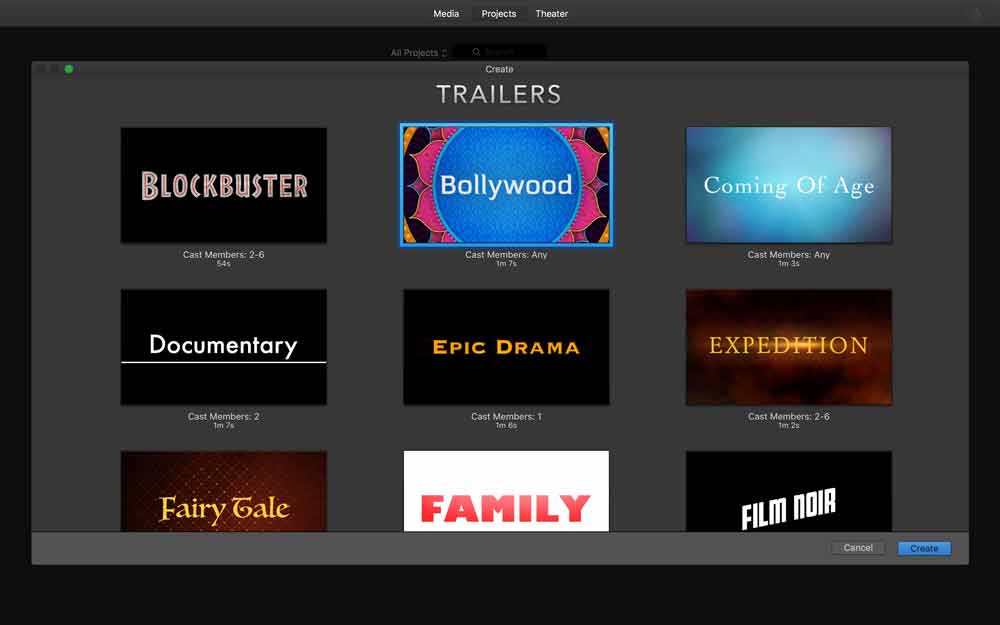
There are two types of projects you can create. Movie Projects and Movie Trailer projects. We’ll first talk about Movie Trailer projects. With a Movie Trailer project, iMovie adds the transitions, titles, and music. iMovie even sets the duration of the clips. All you need to do is add your videos and photos. How do you do that? Drag and drop. Sounds easy, it is. And the best part is these trailers are professional quality. They really look good. You also have a number of templates to choose from to create your trailer with. Now the bad news. Everything is not perfect with Movie Trailer projects. The templates are getting a bit old as Apple hasn’t updated the templates in a few years. It’d be nice to have a greater variety. Also, I wish you could change the Movie Trailer theme once you start create a movie trailer project. When you create a movie project you can change to a different theme even while you are working on the project. Not with trailers. You have to decide first which template you want to use and then after that, you can no longer change to a different theme.

Now let’s look at the other type of project you can create with iMovie, Movie Projects. This is where iMovie really shines. With Movie Projects we can add movies and photos. We can change the duration or how long a photo or video is shown in our project. We can add our own titles. We can change transitions or just use a cut away. We can slow down or speed up video clips. We can rearrange how the photos and videos are in the timeline. We even have effects such as rewind effects. And if you want to do green screen or blue screen effects, iMovie can handle that as well. And it’s all done through drag and drop.
What about audio? iMovie can handle multiple tracks including background audio. You can connect audio clips to video clips (this is called a connected clip in iMovie). You can even detach audio from a video clip. iMovie will also duck audio which will make one audio track quite while another one plays.
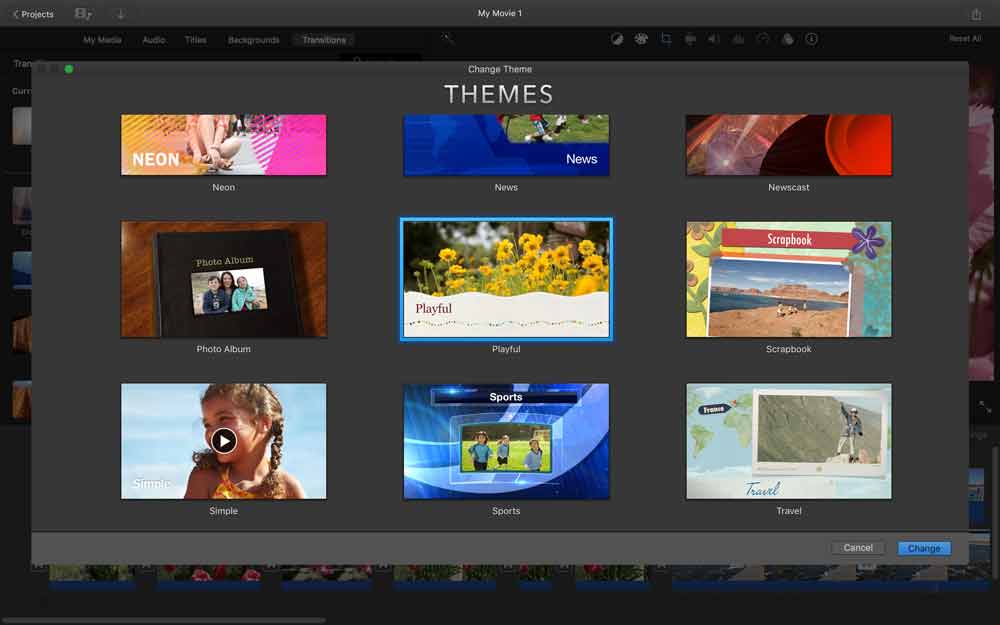
When you create a movie project, you can also apply themes. A theme is basically just a group of transitions and titles that compliment each other. When you apply a theme, iMovie will automatically add the theme’s transitions as you add clips to your timeline. You can assemble a movie pretty quick by using themes as iMovie does a lot of the work for you. The good news is you can decide to use other transitions and titles in your project if you decide to.
I really do not have a lot to complain about with creating Movie Projects. It did seem to crash a bit prior to the latest update 10.21. It seems to be better. Projects were a bit hard to find in prior versions as well, but again in the latest version, they made them pretty easy to find. Other than that when creating movie projects, iMovie does most everything I need it to, at least in my projects.

So now that I’ve created my movie project or trailer, how do I share them? iMovie makes that easy too. I can export them out as files and when I do, I can decide the quality and size. If I’m going to email it, I choose a smaller size. I can also create an HD file. If you just want to share it with your own devices such as your iPad, iPhone, and Apple TV, you just share it to the iMovie Theater. When you open iMovie on your iPad or iPhone and go to the Projects tab, you’ll see Theater and from there all the movies you’ve shared via the Theater will show here. On the Apple TV you download the iMovie Theater app and you’ll be able to view any of your projects you’ve shared via the Theater. There is one downfall with the Theater. It uses space in iCloud, which means you may have pay Apple for more storage in iCloud.
In conclusion, if you want to create movies out of your videos and photos, I’d highly recommend iMovie. The good news is even without much competition, Apple has been continually improving iMovie. It’s both easy to use and it’s fun.
So how do you get iMovie? Well it is available on any new Mac for free and updates are available through the Mac App Store.
If you’d like to learn more about iMovie on the Mac, I do have a tutorial that covers the major features as well as many minor features. It’s available through membership and on the Mac App Store.
We also have a special offer for you – you can save over 50% off our standard rate and join for only $39 a year! This offer includes our 14-day free trial! Start your free trial today and see if our tutorials are a good fit for you!
FREE TIPS AND LESSONS
Subscribe to my newsletter and get free tips and lessons for your Mac, iPad, iPhone, Apple Watch, and Apple TV. I promise not to spam you, I hate spam as much as you do. Of course, you can subscribe at any time. Subscribe today!